
I’ve been a little preoccupies lately with making fairy wings so when I haven’t been at dance, I haven’t been writing. The story goes that at the beginning of the dance year, one of the darling daughter’s teachers asked if I could make fairy wings for all of the girls in one of her classes and for the fairies for the show and for two soloists. For some godforsaken reason, I said yes, despite the fact that I had never made a pair of fairy wings in my life. So I started my research and ordered my supplies, from my bulk wire hangers to my massive role of cellophane to my wire, as well as buying out all of the white knee high stockings at two walmarts. Let me just say that in the instructions, they leave a lot out. 🙂
I figured I would spend the two weeks over Christmas vacation getting a start on my project, after figuring out all of the details beforehand. Of course, we spent a week in Savannah so that cut down my time to one week to get my fairy wing making skills on. One of the things I learned is bending wire is difficult, especially when you want two of the same shape. So, I bent two wires/ hangers at the same time and when I added the stocking for the stocking wings, I re-bent them back into the shape I wanted. Another thing – do NOT cut off the hook. All of the instructions started with cutting the hangers hanger off. DON’T. I loved that hanging part because it allowed me to spray paint the darn things and then hang them up to dry.

After being painted and sparkled, the fairy wings are hanging around waiting for the next step.
Painting the glitter spines was a bit time consuming but I found it worked best to use Modge Podge and a foam brush and then a liberal use of glitter. (Do not fear the glitter – my house sparkles now.) In most of the directions, they tell you to wrap all of the wire ends together with some duct tape and then cover with a ribbon or a flower and then attach some straps or ribbons to tie onto your back. Yeah, doing this is going to have your wings flapping around and not in a good way. It took me some time to figure out the best way to keep them stable. I ended up using these little hard plastic tubes that I had bought for the foaming candy the daughter and I like to make Anyway, we cut off the spin on top and the bottom so it was a hollow tube about 3 inches long and 5/8 inches in diameter. At this point, I did cut off the hanger part of the hanger (on some, I cut most of it off but left a little bit, folded it over and squashed it down.) I wrapped the ends in floral tape and then duct tape – tearing off a piece of duct tape and then tearing it into thirds so it was easier to use. I stuffed the ends into the tubes and then wrapped floral wire in a figure 8 around the wings and then once more before adding some E6000 glue to hold the buggers in place.

The fairy wings!
There is still a little bit of work left to do on these wings but you can see how they turned out. (I have to wrap the little tube with ribbon and add the elastic bands)
But then, there are the wings for the fairies in the show. The teacher wanted them to be iridescent so I looked into cellophane. First off, I bent the wings into shape, which was the easy part. The darling daughter wrapped all of the wire with floral tape and I like how they turned out.

But then it came time to cover them. The instructions and videos make it look so easy to make cellophane wings. It’s not. Unless that was just the cellophane I bought, all four different types from four different stores. It never melted together, except when I didn’t want it to, it was fragile on the frame, it ripped off easily, when the ends were glues down, there was an unattractive ridge along the edges. It has been a frustrating process. So I went to the store and bought some organza. This made the wings absolutely gorgeous but I still struggled with attaching them to the wire frame. (For this, I spray glued the cellophane, added some organza, let it dry a little, flipped it over, spray glued the other side, put the wire frame down and another piece of organza) I tried several methods before coming up with the one I think will work. I still have one side of organza with the cellophane (organza on the outside, the cellophane next to the wire frame) but things are a little different. At this point, the edges are snipped and then glued down close to the wire frame. And then I use 4 mm vinyl on the other side. I haven’t glued the edges down yet but I am very happy with how much more durable the wings seem to be.
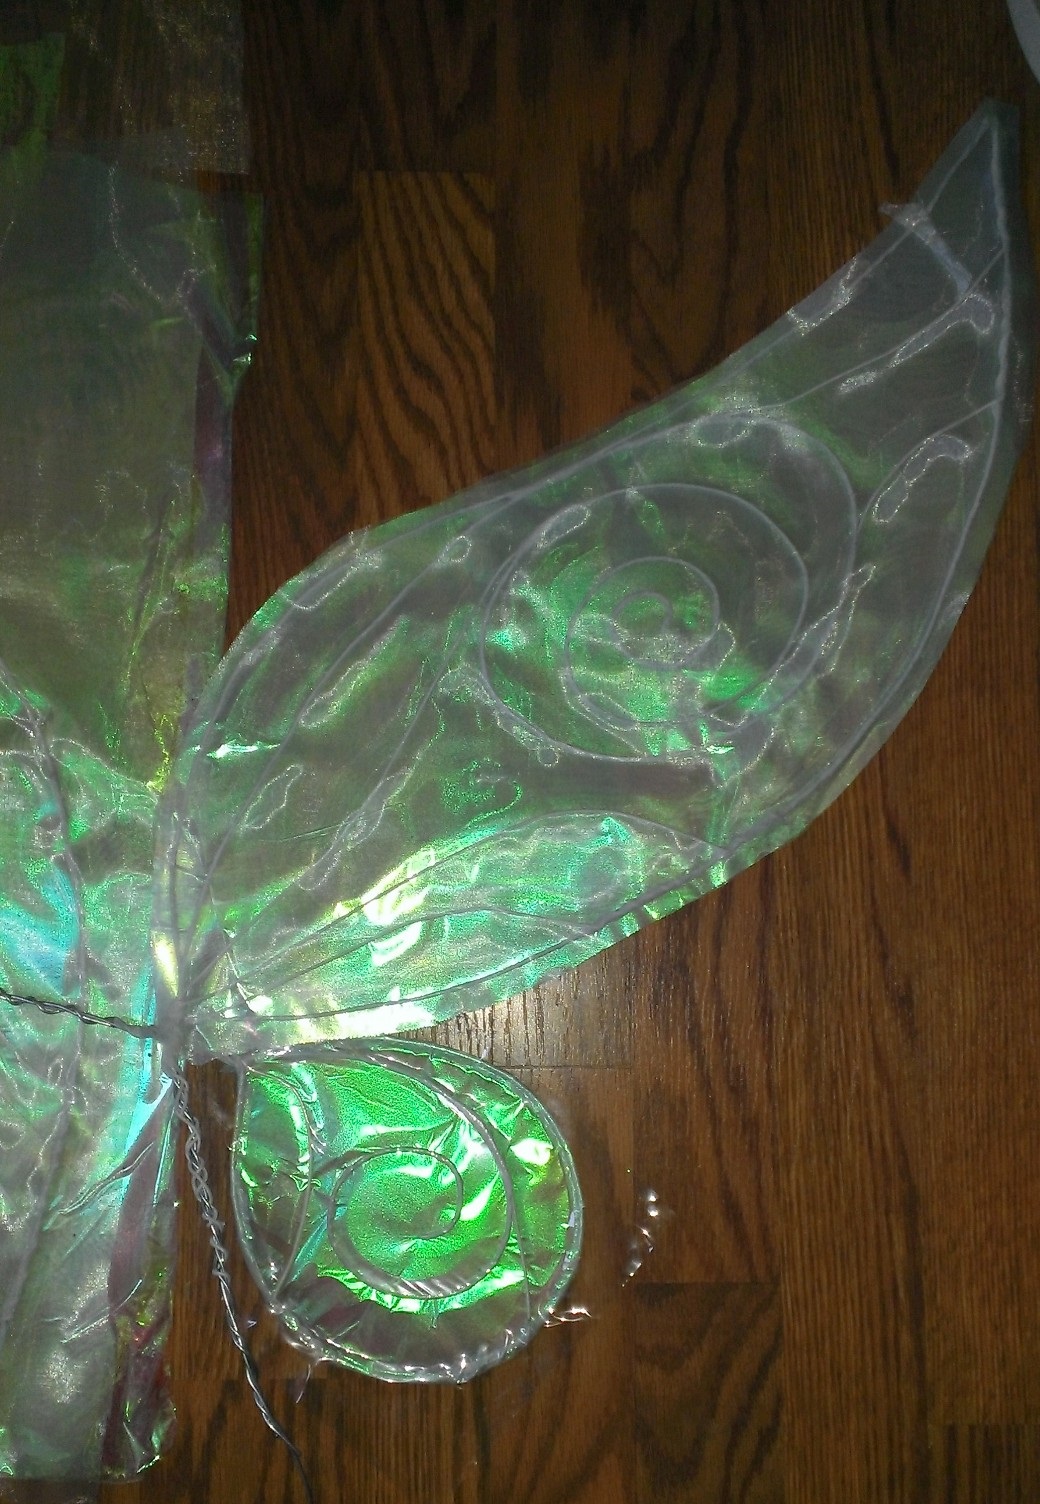
The top wing is the organza-cellophane-wire frame-organza while the bottom is the organza-cellophane-wire frame-vinyl.
So, that has been my life for the past couple of weeks. it has been a lot of fun and occasionally frustrating. For the second type of wings, I have to figure out if they can be made with the u-hook so they can be slipped into a bodice or if they’ll have to be put in the tube thing. I just have to finish them up so I can work on A Million Kisses or More and Stone Seduction!
(Yes, making fairy wings WILL be mentioned in my next book)
